This weeks challenge is to create a layout using no glue... No glue sticks, glue dots, glue runners, glue pens, etc... You must find other ways to hold your layout together! Staple, tape, whatever your heart desires.
Have Fun!
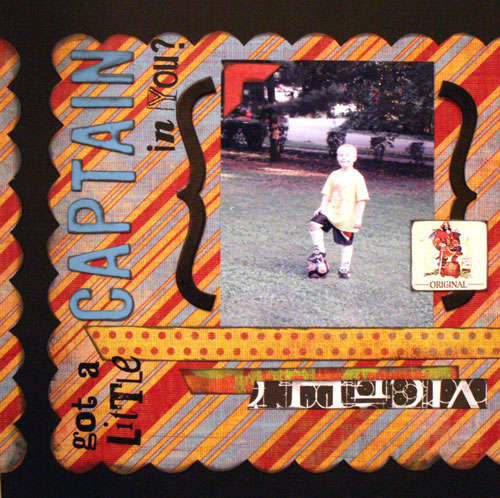
Sunday, April 8, 2007
Sunday, April 1, 2007
Weekly Challenge #14
Girlzz, your challenge, should you choose to accept it, is to create a layout, any size, using ZERO embellishments. Nada. Not one brad, not one sticker, not one strand of ribbon. Pens, paper, photos.
Happy scrapping ;).
Happy scrapping ;).
Wednesday, March 28, 2007
Packing & Labeling Roll Call Results
Well... we only lost one set in transit. I'll stay on the look-out for them Sarah! I'm going to scan all the pages for archival records. I suggest we get them printed as a digital scrapbook for "Our Foreign Correspondent" and future participants as well as use them in our Scrap Happenzz Blog Bios.

Updates listed in the side-bar. I'm packing and labeling the sets today. I'll get them postal ASAP.
We gotz Skillz!
Updates listed in the side-bar. I'm packing and labeling the sets today. I'll get them postal ASAP.
We gotz Skillz!
Sunday, March 25, 2007
Week 13- Phrase It!
Round of applause to the takers of last week's challenge:
- Nitza
- Mel
- K
- Katie
- Brenda
- Tiff
- Angela
Great LOs everyone!!!
Now, for this week I have decided to do another type of challenge that has to do with some sort of words. In this case, the words are going to be a slogan/phrase. It can be something you've seen in a commercial, a slogan/phrase you know for a particular item/brand of things, etc. There are no rules other than using a slogan/phrase that you take, meaning it already exhists. I've got a couple examples below that I've found in the gallery:

The first one is obviously from the captain morgan slogan/phrase. The second one is the Kraft macaroni and cheese slogan/phrase. It can be silly or serious. It could also just be a tid bit from a song, however you would like to interpret it. Like I said, besides including a slogan/phrase there are no other rules. Just, have fun!
Sunday, March 18, 2007
Week 12 Challenge – All in a Word
Kudos to those that Completed week 11...


- Nitza
- Moi
- Mel
- Kay
- Katie
- Tiffany
- Angela
- Anne
Don’t forget to DELETE your bumps.
Week 12 begins Sunday, March 18th - Your challenge, should you choose to accept it, is to scrap your favorite word! No rules, restrictions etc - just what your word is, why you chose it and what it means for you… could be all photos or no photos, the choice is yours. Hint… hint: This is a great addition to your BOM – or a perfectly easy way to start one! Upload your layouts by Sunday, March 25th.
Here are some samples:
Monday, March 12, 2007
Le'ts Get Better At Photo Placement Part 4 + Weekly Challenge Week 11
Let’s become better at photo placement part 4.
Give an applause or some gallery feedback to all whom participated in last week’s scrapjack weekly challenge. Participants include:
Kayla
Tiff
Robyn
Jessica
Angela
Katie {retroactive}
Christy
Annie (I think she just needs to take a photo of it)
Weekly Challenge 11
This week’s challenege. I am really jazzed about it, because this challenge will make us better scrappers, undoubtedly. Create a layout with minimum 3 photos utilizing good photo placement. I talked about creating a “line” “circle”, or a “block” and the different ways to do these types of layouts without them looking the same. If you gave me links to your fave layouts, please try and use the analysis I came up with to do your layouts. OR tell me I am full of crap. Discussing photo placement will in turn develop your skills. Learning what and why layouts catch your eye will in turn help you develop good photo positioning. I am leaning for 100% participation here, and I am giving out a nice prize to the person deemed the best at placing photos.
Now for the rest of the personal critiques: please think about them, mull them over, and draw your own conclusions.
Tiffany: you’re a collage kind of grrrl. I would begin with a block, circle, shape, or line {doesn’t have to be straight, can be vertical, horizontal, diagonal) and place the photos linearly. Then I would tilt each photo crooked or place the photos overlapping slightly until you are comfortable with the placement. The 3 layouts you chose have unique angles and overlapping but the photo placement is ultimately in a block or a line! When you make a collage, matting is important to distinguish between photos. Matting a ton of photos is no fun, so I suggest sanding the sides lightly as a shortcut.
Sarah: if you don’t have a subscription to simple scrapbooks, you should get one. You like very linear layouts that focus on the photos. You like lines. Simple Scrapbooks magazine and online will have tons of ideas and sketches for you. But if you running out of ideas, line up the pictures and just mix patterned paper linearly above and below it. Use different textures and papers and each layout will look different.
Angela: the layouts you chose all have style, they all have a big wow factor attributed to them. So make a line out of your pictures but then add something cool. Cut the bottom of the line into a wave, or the top, or both. Or make a block with the photo both but cut one side in a half circle. Place the photos in a ring. Enlarge photos that you like the most and use this as your focal point and place the other photos around it using the guidelines established in the other part of this mini-challenge.
Mel: Linear type grrrl with a twist. You like a fun twist. The photos are in the shape of a circle which forms a line. There is a straight line of photos on the layout but there is an enlarged photo with it that grabs your attention. The photos are in a line that is not straight, and even though it is titled, it is linear and adds flow to your page. So enlarge the photos that are extra special, and place the others around it to compliment it. Start with a straight line, but if you think that’s boring, tilt them, make a less apparent line, round the corners, or cut them into circles.
Katie: I know multi-photo isn’t your style but you picked crisp, linear layouts. I would have expected you to pick layouts that Tiffany chosen. The layouts you chose would evoke the same comments that I gave Sarah!
If I missed anyone please let me know, but these are all the links I have in my pm’s and in the comments.
Tuesday, March 6, 2007
Let's all get better at Photo Placement: Part 3
Multi-Photo.
Before printing your photos:
- Analyze your list and determine how many you want to print for a layout
- Are all the photos in the same color scheme? Will matching patterned paper and accessories be challenging? If you prefer unified look, turn all photos from same event into black and white.
- If one photo is particularly better than the rest, print it larger {5x7}
- Print rest of photos 4x6 or make them wallet size by placing them in a 4x6 on photoshop or equivalent.
- Do not be afraid or cropping on the computer before printing. The best feature of a digital camera is that we can manipulate the photos we take. Print a close up, crop out the background, or print a perspective photo with a small object and a big background.
Placing the photos:
- Decide on matting. You can use cardstock, sand the edges, paint the edges, no matting {photos touching}, digital overlays {can be printed with these or they can be printed on a transparency and tacked over the photo}, or use the background paper as matting.
- When in doubt, make a line. The line doesn’t have to be straight, the photos can be staggered but it should make a line across the page. Vertically, horizontally, diagonally. Placing the photos closer together looks better than having huge gaps.
- Push photos in the center of the page to form a “circle.” Many of you chose a layout like this for your inspiration. Journal around group of photos and add title above or below. This is an easy template to use and reproduce but it needs 4-8 photos to look good, great way to capture many photos from Christmas morning or another special event.
- Don’t like those option? Make blocks. A block can look like using ONE photo on a layout. Put like photos together in a block of whatever shape you want {circle, square, star, heart, trapezoids, rectangle, etc.} and place the block in the side, or side, or up, or down and use the rest of the page to journal, or mix patterned papers. Don’t have enough photos to make the block you want? Use patterned paper to fill in the spot and place you journaling on it or a silk flower, or your fave embellie.
- Photo placement also depends on the orientation of the photos. Are they all horizontal? If so make a vertical line in the middle of the page. The line can be straight. The photos can be overlapping and titled. The photos can be cropped so that they do not span the whole page. The line can be center, to the left or to the right. The line can even be like a zizag or can be slightly horizontal. You can even cut the line into a wave going across the page. The wave can be cut from the bottom, or the top, or both ends. All the photos can be aligned and you can have a large one breaking the linearity. Rule: 3 4x6 uncropped photos can make this line. Or 4 cropped 4x6’s.
- Are all the photos vertical? Make a horizontal line across the page. The same rules apply. The photos can be straight or tilted. The line can be high, middle, or low on the page. Wave thing applies here too.
- Are the photos a mixture? Then the circle method is good. Place the most important photo in the middle of the page and use the other photos around it. Journal around the photos or make a block that looks like a photo.

Denitza:
- In the layouts you chose, all the photos are touching. You like it when the photos form a line spanning the whole page but the photos in that line are all tilted so that they’re overlapping in some instances. The photos are always in the same color scheme.
- The layouts you chose mostly use 4x6 photos that are cropped a little.
Robyn:
- You chose layouts that either form a line or having the middle “circle” method I described earlier. The layouts you chose seldom use 4x6 photos. Each layout has a dominant photo that is blown up and all the other photos compliment and aid the story. The photos are all close together and you chose every different kind of matting possible. You like straight photos and not tilted so that the photos are often overlapping.
Brenda:
- You like when photos are in a block. So make block with your photos. A lot of the layouts you
chose have 4x6 that form a square at some place within the page. Use the rest of the page as a
canvas to mix patterned papers, doodle, or place embellishments. You like the wavy thing and
that’s the same as having a line going across the page except the line incorporates soft curves.
So make your blocks girl.
Subscribe to:
Comments (Atom)