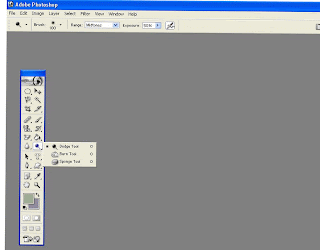
First lets start with something you probably all ready know but for those Photoshop virgins out there, we will share. The Bar at the left side of the page we will refer to as our toolbar. On the lower right corner of most of the tools you will see a tiny triangle, this means there are other tools that are hiding behind the tool showing. If you click on the tool and keep your mouse button pressed for a few seconds, you will see the pop up menu as displayed above that shows the tools hidden behind. You can move your mouse over and click on one of the other tools to bring it to the forefront on the toolbar and use it as an active tool.
On the toolbar, look to the left column of tools, about midway down you will see that I have clicked on the lollypop looking thing. That is called the dodge tool, behind it are the burn & smudge tools. Lets say you have an object in a photo that is shaded, maybe someones face has a shadow, the Dodge tool can help. If you have an overly bright area, the burn tool could help there.
Dodge & Burn Tools:
First a few tips:
If you have very dark shaded areas, they probably dont have a lot of digital detail so even after using the dodge tool, you could still end up with grayish shadows.
If you have overly lightened areas, the burn tool may not have good results either.
You'll want to use either of these tools in moderation and work on small areas.
1)Click on either of these tools to activate it.
2)Choose your brush (It is usually best to zoom in fairly close to the part of the photo that you are wanting to work on and using softer brushes will blend better to the surrounding parts of the photo)
3)Now Choose the range option you desire
shadows to lighten or darken
midtones to adjust the tones of average darkness
highlights to make the brightest areas even lighter or usually, darker.
4)By using the exposer slider/text box, choose the amount of the effect you want to apply.
5)Now click on the areas of the photo that you would like your desired effect on (or hold down your mouse button and “brush” across the area), until you are satisfied with the outcome. The more times you go over the same spot, the more it will increase the effect. It Be careful not to over-do it but if you do, you can always back up via your History Palette. (Please notify if you need to know more about the History Palette and we'll cover that next)
Below are some samples of using the Dodge tool. Notice how her hair is so dark that it blends into the background, on a few of the photos I did try to lighten her hair too but as the tip above states, due to the lack of digital detail, nothing really resulted.
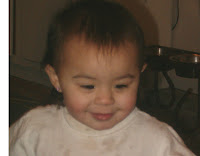
Original
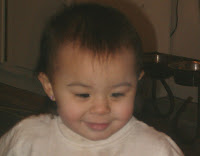
Using shadows @ 22%
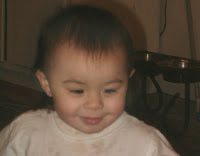
Midtones @ 50%
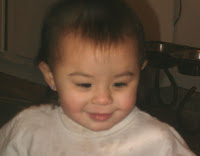
Highlights @ 25%
Obviously you will get different results for different photos & circumstances. You will need to just play with what looks good to the eye until you find what works.
5 comments:
Professor Christy, I truly appreciate being edumacated on Photoshop. Thank you.
Do you really think a professor would refer to something as the lollypop looking thingy? LOL
Christy, this is fabulous and exactly what I envision. I can't wait to play around!
*smothers of kisses* NO tongue this time, nasty girl.
Christy, this is awesome! Thanks for educating us!
Just to add in a quickie...dodge and burn digitally is based on a darkroom concept where you would literally "burn" more light into areas of a photo to lighten them or move a cardboard circle over an area to "dodge" the light away. I use this tool the most when I want to deepen shadows and add additional contrast to an image. Christy is 100% right about restoring something digitally...if it's not already there, dodging/burning won't make it appear. Great tutorial!
Post a Comment